

Chipped Laminate Worktop Repair
Colour-Matched, Grain-Replicated Chip Repair for Laminate Worktops Across Surrey, Hampshire & Berkshire
A chipped laminate worktop looks worse than it is. Laminate is a printed decorative layer bonded to a chipboard or MDF substrate — so the moment that layer breaks, the raw substrate underneath is exposed, pale, and completely unmatched to the surface around it. It looks alarming. Most people assume the only fix is full replacement.
In the majority of cases, it isn't. With 20 years of specialist worktop repair experience across Surrey, Hampshire, and Berkshire, we repair chipped laminate on-site by reconstructing the damaged substrate where needed, then hand-replicating the decorative pattern and colour directly over it — grain, flecks, and all — so the repair sits within the surface rather than on top of it.
Why Laminate Chips Look Worse Than They Are
Laminate worktops are built in layers: a chipboard or MDF core, a decorative printed paper layer carrying the wood-grain or stone-effect pattern, and a thin protective overlay sealing it. There is no colour running through the material, unlike Corian or solid timber. Once that decorative layer is broken — by an impact, a dropped pan, or a sharp corner catching a passing tray — you are looking directly at the substrate, not at a deeper layer of the same material.
This is why laminate chip repair is fundamentally different to Corian or timber repair. There is nothing to abrade back to reveal matching material underneath. The repair has to rebuild the missing structure where it exists, then recreate the pattern by hand. Get the base reconstruction wrong and the repair will crack or lift. Get the pattern replication wrong and the repair stays visible however sound the structure underneath it.
Understanding Laminate Chip Damage
Not every laminate chip needs the same approach. A shallow surface knock and a deep structural crater are different repairs entirely, and treating them the same way either wastes time on a simple graze or under-builds a genuine structural loss. We assess the depth and extent of the damage in person before deciding which process applies.
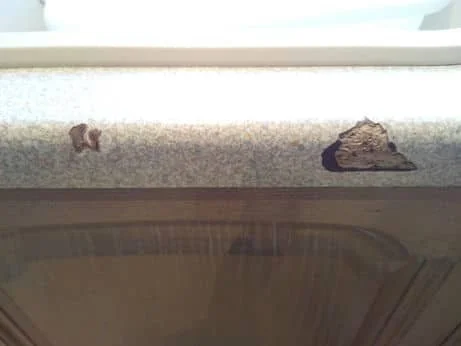
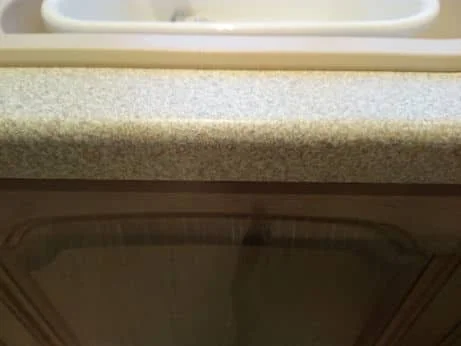
Our Chip Repair Process — Two Scenarios
Scenario 1: Surface Chips — Colour-Matched Resin Repair
This is the most common laminate chip we see — a corner knock, a dropped tin, a scrape from a moved appliance. The decorative layer is broken but the substrate loss is shallow and localised, with no structural crater to rebuild.
We fill the chip with Tenax Vinyl Ester resin, colour-matched on-site using solvent-based tints mixed manually against the worktop's actual colour rather than a generic swatch. Once cured, the resin is levelled flush, then given a light 240 grit key sand — never 80 grit, which is too aggressive for laminate and will burn through the surrounding decorative layer. We finish with fine detail brushes and solvent-based acrylic enamel paints to hand-replicate the wood-grain, fleck, or pattern directly over the repair, sanding lightly at 240 grit between coats to build the pattern in believable layers rather than a single flat colour patch.
Scenario 2: Deep or Bulk Structural Chips — Substrate Reconstruction
Where an impact has gone through the decorative layer and into the substrate — a corner knocked off entirely, a deep gouge, or a crater from a heavy dropped object — there is genuine structural material missing, not just a broken surface layer. Filling this with resin alone would shrink and crack, because resin is not designed to replace bulk structural volume.
For this level of damage we use Easy 8 and Top Stop Gold fillers to rebuild the lost substrate first, working in stages to avoid shrinkage as the filler cures. This restores the correct shape and depth before any colour work begins. Only once the base is rebuilt and stable do we apply Tenax Vinyl Ester resin as the final, visible, colour-matched top layer. From that point the process matches Scenario 1 — level, 240 grit key sand, then hand-painted grain and pattern replication in layers, each lightly sanded at 240 grit between coats.
This staged approach — structural rebuild first, cosmetic replication second — is what separates a repair that holds up under daily use from one that looks fine for a few weeks and then fails at the edge.
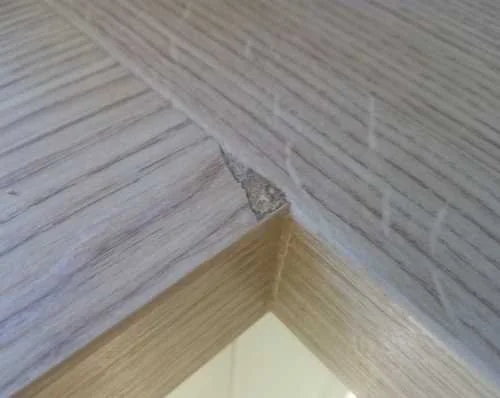
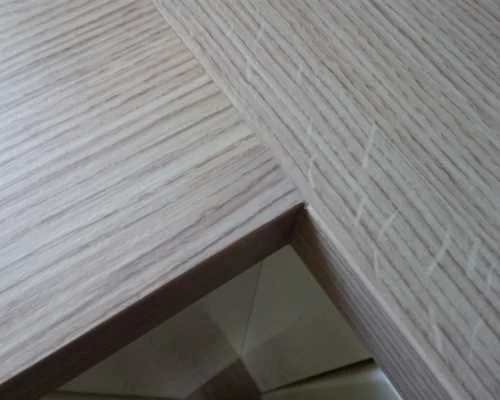
Colour and Pattern Matching — Where the Repair Actually Lives or Dies
The technical rebuild is only half the job. Laminate patterns are printed, so every worktop's wood-grain, fleck, or stone-effect pattern is slightly different even within the same product line, and fades slightly with age and UV exposure. We mix acrylic enamel tints manually on-site against the actual worktop, not against a manufacturer's original swatch, and build the pattern in thin layers rather than one solid colour block — replicating individual grain lines, flecks, or veining by hand with fine detail brushes. This is the stage that takes the most time and the most judgement, which is why we assess every chip in person before quoting rather than pricing over the phone.
An Honest Note on Results
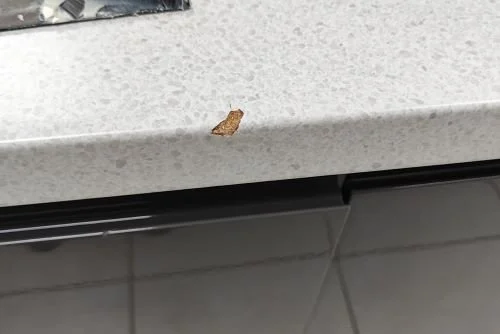
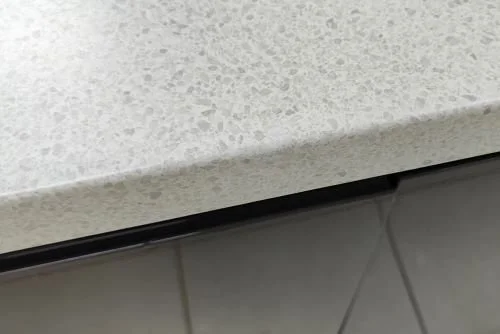
For Scenario 1 surface chips, a correctly colour-matched and hand-grained repair blends very well under normal kitchen lighting and is genuinely difficult to spot once complete. For Scenario 2 structural rebuilds, the structural integrity is fully restored and the visible finish is very good — but under raking light or in direct sun, a hand-painted repair on a printed pattern can occasionally be identified by someone who knows exactly where to look.
We will never tell you a repair is invisible if it isn't. A highly regular, machine-printed pattern with repeating grain is generally more straightforward to match; a busy, irregular pattern is often more forgiving, not less. We will assess your specific worktop and tell you honestly what result to expect before any work begins.
Frequently Asked Questions
Do I need to replace my laminate worktop if it's chipped?
No, not in the majority of cases. Surface chips are repaired with colour-matched resin and hand-grained pattern work. Deeper structural chips are rebuilt with bulk fillers first, then finished the same way. Replacement becomes genuinely necessary where the substrate has taken on water damage over a wide area, or where multiple chips sit close enough together to compromise a large section of the worktop edge.
Will the repair be a different colour to the rest of the worktop?
It shouldn't be. We mix tints manually against the actual worktop on-site rather than working from a generic colour reference, and build the pattern in hand-painted layers to replicate grain and flecking rather than filling with a flat block of colour.
How long does a chipped laminate repair take?
A Scenario 1 surface chip is typically completed in a single visit, usually within a few hours including cure and sanding time between coats. A Scenario 2 structural rebuild takes longer, as the filler needs to cure in stages before colour work begins, and may require a second visit depending on the extent of the damage.
Can chips on the worktop edge or around a hob cutout be repaired the same way?
Yes. Edge chips and cutout corner damage are common and are treated with the same process. Where a hob is fixed directly to the worktop at the cutout, we ask that it's disconnected and removed before we begin work on that edge.
Why can't I just use a DIY laminate repair kit myself?
Off-the-shelf kits use a single generic colour and a printed pattern sheet that won't match your specific worktop's grain, fleck, or fade level. They also don't address bulk structural loss on deeper chips, which is why DIY repairs on anything beyond a pinhead-sized mark tend to look like exactly what they are — a patch, not a repair.
Do you cover my area?
We cover Surrey, Hampshire, and Berkshire from our base in Ash, on the Surrey and Hampshire border. Call us on 01252 961927 to confirm coverage for your location.
Aftercare: Protecting Your Repaired Laminate Worktop
What to do:
Clean with a mild, pH-neutral surface cleaner and a soft cloth. Wipe up spills promptly, particularly around the repaired area and any worktop joins, to keep moisture from reaching the substrate underneath.
What to avoid:
Never use abrasive scouring pads or cream cleaners like Cif on laminate — they will dull the printed surface and make any future repair harder to blend. Avoid sodium hypochlorite bleach and products like Flash on the repaired area, as prolonged chemical contact can affect the acrylic enamel colour work. Never place hot pans or trays directly on the surface, and don't allow standing water to sit at worktop joins or around a sink cutout, as laminate substrate is vulnerable to swelling once moisture gets underneath the decorative layer.
Need Your Laminate Chip Assessed?
If your laminate worktop has a chip, a knocked corner, or a deeper impact crater, call us before you accept a replacement quote. In the majority of cases we can repair it on-site — rebuilding the substrate where needed and hand-matching the colour and pattern — for a fraction of the cost of a new worktop, across Surrey, Hampshire, and Berkshire.
→ For water ingress and swelling at joins or sink cutouts, see our [Water-Damaged Laminate Worktop Repair] page
→ For discolouration and chemical marking rather than physical damage, see our [Laminate Worktop Stain Repair] page
→ For heat marks and scorching from pans or hot trays, see our [Laminate Worktop Burn Repair] page
→ For a full overview of our laminate services, return to the [Laminate Worktop Repair Services] page
→ View our full range of worktop repair services on the [Surrey Worktop Repair] hub